Looking for a WYSIWYG (What You See Is What You Get) editor for your Spring Boot app? If so, then check out TinyMCE.
In fact, I use that solution for this very website.
In this guide, I'll show you how you can implement a WYSIWYG editor with TinyMCE and Thymeleaf.
If you'd like to go straight to the code, you can take a look at it on GitHub. Just be forewarned that you'll need to update the addEditPost.html file with your own TinyMCE API key.
And if you have no idea what that means, then it's best to read on.
The Use Case
Your boss Smithers walks into your office to let you know that he's not happy with the current state of the company blog.
He sits down in the chair opposite your desk, crosses his legs authoritatively, and says that he wants blog admins to have the ability to produce content with a WYSIWYG editor. Right now, they have to write their own HTML code and that sucks.
You agree with the "that sucks" part and tell him you'll get to work on a solution right away.
He smiles and leaves your office.
Get TinyMCE
The first thing you need to do is get a WYSIWYG editor.
Now, you could write one from scratch. But that takes time. And time is something you don't have because you're a software developer.
So you determine that it's best to go with the Cadillac of front-end WYSIWYG solutions: TinyMCE.
TinyMCE bills itself as "the most advanced HTML WYSIWYG editor." That's probably just puffing, but there's no doubt that plenty of people will agree with the statement.
One of the reasons your fellow developers love TinyMCE so much is because you can get up and running in short order.
Oh, yeah. You can't beat the price, either. It's free.
A caveat, though: it's free if you don't want support, premium plugins, or flashy skins.
But if you'd just like to get something up and running right away, it's free. And it's one of the most powerful free tools you'll likely ever use.
So how do you get it? That's easy. Just visit the website and create an account.
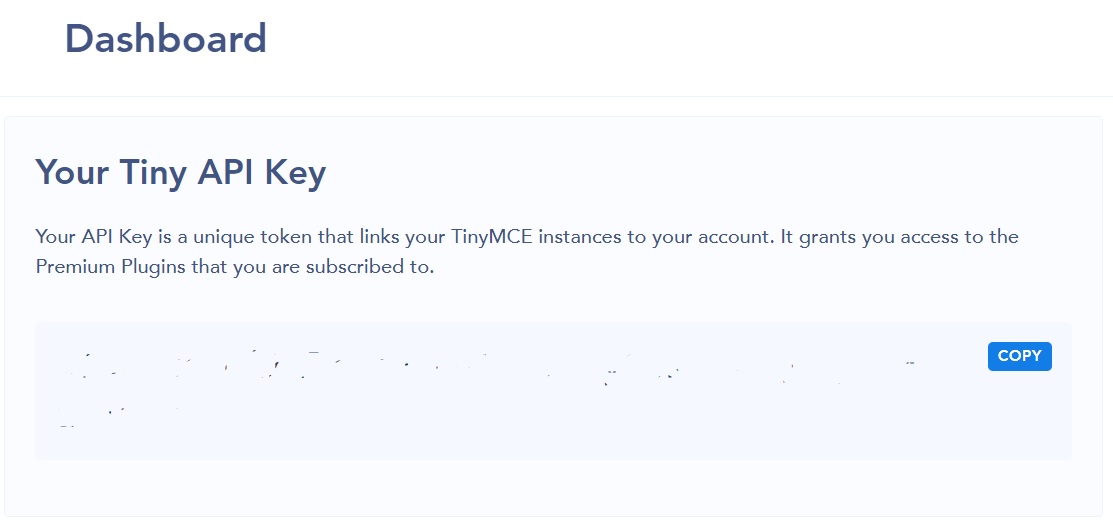
Then, you'll see a screen that looks like this:

I've redacted my TinyMCE key. But you'll see yours there in VERY large letters and numbers.
Just keep that window open so you can get the key later. Alternatively, you can copy and paste the key to scratchpad.
The Spring Boot App
There's nothing terribly unusual about the configuration of this Spring Boot app. Here's what the POM file looks like:
<project xmlns="http://maven.apache.org/POM/4.0.0" xmlns:xsi="http://www.w3.org/2001/XMLSchema-instance" xsi:schemaLocation="http://maven.apache.org/POM/4.0.0 http://maven.apache.org/xsd/maven-4.0.0.xsd">
    <modelVersion>4.0.0</modelVersion>
    <groupId>com.careydevelopment</groupId>
    <artifactId>tinymce-guide</artifactId>
    <version>0.1-SNAPSHOT</version>

    <parent>
        <groupId>org.springframework.boot</groupId>
        <artifactId>spring-boot-starter-parent</artifactId>
        <version>2.1.0.RELEASE</version>
    </parent>

    <dependencies>
        <dependency>
            <groupId>org.springframework.boot</groupId>
            <artifactId>spring-boot-starter-web</artifactId>
        </dependency>
        <dependency>
            <groupId>org.springframework.boot</groupId>
            <artifactId>spring-boot-starter-thymeleaf</artifactId>
        </dependency>
        <dependency>
            <groupId>org.apache.commons</groupId>
            <artifactId>commons-lang3</artifactId>
        </dependency>
    </dependencies>

    <properties>
        <java.version>1.8</java.version>
    </properties>

    <build>
        <plugins>
            <plugin>
                <groupId>org.springframework.boot</groupId>
                <artifactId>spring-boot-maven-plugin</artifactId>
            </plugin>
        </plugins>
        <finalName>${project.artifactId}</finalName>
    </build>

</project>
As you can see, you only need three dependencies. One of them is Thymeleaf because Spring Boot is acting as a web app here instead of a simple REST service.
And yeah, you're still using Java 8. You tell yourself you'll move to Java 11 when it's necessary.
If it ain't broke, don't fix it.
The Model
For the purposes of this guide, you only need to know about one model: the blog post.
To keep things simple, the blog post model will only include two fields: the title and the body.
Now, any real blog post would include a variety of other fields, like publication date, author info, and so on. But you just need to get the basics working for now.
So here's what the blog post model looks like:
public class BlogPost {

	private String title;
	private String body;

	public String getBody() {
		return body;
	}
	public String getTitle() {
		return title;
	}
	public void setBody(String body) {
		this.body = body;
	}
		public void setTitle(String title) {
		this.title = title;
	}

    public String toString() {
		return ReflectionToStringBuilder.toString(this);
	}
}
Easy as pie.
The body, by the way, is the part that will get mapped to the content of the TinyMCE WYSIWYG editor. It will include HTML markup.
The Controller
You're on the simple path so there's only one controller here. It includes two public methods.
@Controller
@RequestMapping("/admin")
public class BlogPostController {

	@GetMapping("/addEditPost")
	public String addEditPost(Model model, @RequestParam("blogPostId") Optional<String> blogPostId) {
		setDefaultBlogPost(model);
		return "admin/addEditPost";
	}


	@PostMapping("/addEditPost")
	public String addEditPostSubmit(Model model, BlogPost blogPost) {
	    System.out.println("Title is " + blogPost.getTitle());
	    System.out.println("Body is " + blogPost.getBody());

		return "admin/addEditPost";
	}


	private void setDefaultBlogPost(Model model) {
		BlogPost blogPost = new BlogPost();
		model.addAttribute("blogPost", blogPost);
	}
}
Unsurprisingly, the controller is annotated with @Controller. If you're new to this, you won't be shocked to learn that the @Controller annotation tells Spring Boot that this class is a controller.
That would be the same controller that's the "C" in the MVC (or Model-View-Controller) pattern.
But you also have a @RequestMapping annotation at the top. That tells Spring Boot that the URL path for all of the endpoints specified in this controller will start with /admin.
That's just a safety precaution so you can harden the site later on. When you do that, you'll prevent anyone who isn't an admin from accessing any endpoint that begins with /admin.
The class includes two public methods. One handles a GET request while the other handles a POST request.
As you can see, both of those methods reference the same endpoint: /admin/addEditPost.
The GET handles serving up the page where a user will create a new blog post from scratch. The String that it returns at the end ("admin/addEditBlogPost") maps to a Thymelaf template named addEditBlogPost.html that's located in src/main/resources/templates/admin folder in the source tree.
That template renders an HTML page that displays a blank title field and a WYSIWYG editor that's also blank.
Those elements are blank, by the way, thanks to the createDefaultBlogPost() method you see above. That method instantiates an empty BlogPost object and puts it in the model so the Thymeleaf template can read its contents.
When the user clicks the Save button on the page, the application will submit the contents of the form by sending a POST request to /admin/addEditPost.
That's where the addEditPostSubmit() method comes into play. But all that method does here is just print out the contents of the title and body fields in the BlogPost object.
If this were a real application instead a guide to using TinyMCE, you'd persist that info in a data store.
The Template
And now we get to the part where the rubber meets the road.
Here's what the addEditPost.html Thymeleaf template looks like:
<!DOCTYPE html>
<html lang="en-US" xmlns:th="http://www.thymeleaf.org">
<head>
    <object th:include="fragments/head :: head" th:remove="tag"></object>
    <title>Add/Edit Post | Carey Development</title>
    <script src="https://cdn.tiny.cloud/1/[YOUR API KEY HERE]/tinymce/5/tinymce.min.js" referrerpolicy="origin"></script>
</head>

<body>
<div class="container">
    <object th:include="fragments/topbar :: topbar" th:remove="tag"></object>

    <form id="addEditForm" th:action="@{/admin/addEditPost}" th:object="${blogPost}" method="POST">
        <div class="row">
            <div class="col-md-9">
                <label>Title</label>
                <div>
                    <input type="text" class="form-control" style="width:100%" maxlength="128" th:field="*{title}" placeholder="Enter title here"/>
                </div>
            </div>
        </div>
        <div class="row">
            <div class="col-md-9">
                <textarea th:field="*{body}" style="width:100%; height:600px"></textarea>
                <script>
                    tinymce.init({
                        selector: '#body',
                        plugins: 'link lists media code',
                        toolbar: 'alignleft aligncenter alignright alignjustify | formatselect | bullist numlist | outdent indent | link code',
                        toolbar_mode: 'floating',
                        tinycomments_author: 'Brian Carey'
                    });
              </script>
            </div>
        </div>
        <div class="row">
            <div class="col-md-9">
                <input type="submit" value="Save"/>
            </div>
        </div>
    </form>
</div>

</body>
</html>
Pay particular attention to the <script> tag inside the <head> element. That's where you're referencing the TinyMCE script.
It should go without saying but I'll say it: you need to substitute [YOUR API KEY HERE] for your API key. The code won't work unless you do that.
Next, take a look at the <form> element. As you can see, it's using standard Thymeleaf notation to associate the fields in the empty BlogPost object you constructed in the controller with the fields in the form.
If you'd like to learn more about associating forms with plain old Java objects, take a look at my guide on implementing form field validation with Spring Boot and Thymeleaf.
Next, take a look at the first input field:
<input type="text" class="form-control" style="width:100%" maxlength="128" th:field="*{title}" placeholder="Enter title here"/>
That's where the user will enter the title. The th:field attribute associates the name and ID of the element ("title") with the field of the same name in the BlogPost object.
So when the user saves the form, Spring Boot will populate the title field of the BlogPost object with whatever the user entered in that field.
But that's pretty basic stuff. Now, it's time to look at the WYSIWYG editor.
The Textarea
The TinyMCE editor is defined as a <textarea> field. That's because users need a little more vertical space than they generally get with standard <input> fields.
Let's take a deep dive into the code:
<textarea th:field="*{body}" style="width:100%; height:600px"></textarea>
<script>
    tinymce.init({
        selector: '#body',
        plugins: 'link lists media code',
        toolbar: 'alignleft aligncenter alignright alignjustify | formatselect | bullist numlist | outdent indent | link code',
        toolbar_mode: 'floating',
        tinycomments_author: 'Brian Carey'
    });
</script>
Once again, you're mapping the name of the field ("body") with the BlogPost object field of the same name.
You're also setting the width of the <textarea> to 100% of the width of the parent element. The height of the field is 600 pixels.
The <textarea> element is followed by some JavaScript that configures your TinyMCE editor. Let's look at that in detail.
The selector property specifies how TinyMCE will identify the element that will get the WYSIWYG treatment. Here, you've set it to '#body' which is standard jQuery notation for "the element with the ID of 'body'."
That might seem a bit confusing because, at first blush, there doesn't appear to be any element on the page with an attribute of "id" set to "body."
At first blush, there isn't. But when Spring Boot with Thymeleaf serves up this page in raw HTML format, that <textarea> will get an ID of "body."
In fact, it will also get a name of "body."
That's how Thymeleaf handles the translation from th:field="*{body}" to normal HTML.
There are other selectors you can use to identify the target, but using the ID is my favorite choice.
Next, let's take a look at this:
plugins: 'link lists media code',
That identifies the plugins you want to use with TinyMCE. Thankfully, all the plugins listed above are free of charge.
The first plugin, link, gives users the option to quickly add hyperlinks to their content. They can even do the traditional Ctrl-K thing.
The next plugin, lists, enables users to add lists with bullet or numbered points.
The media plugin allows users to add HTML5 video and audio to their content. We won't be looking at that here, though.
Finally, the code plugin enables users to view the HTML code of their content instead of looking at it in a WYSIWYG layout. That's useful if they'd like to do some custom formatting.
Okay, on to the next line:
toolbar: 'alignleft aligncenter alignright alignjustify | formatselect | bullist numlist | outdent indent | link code',
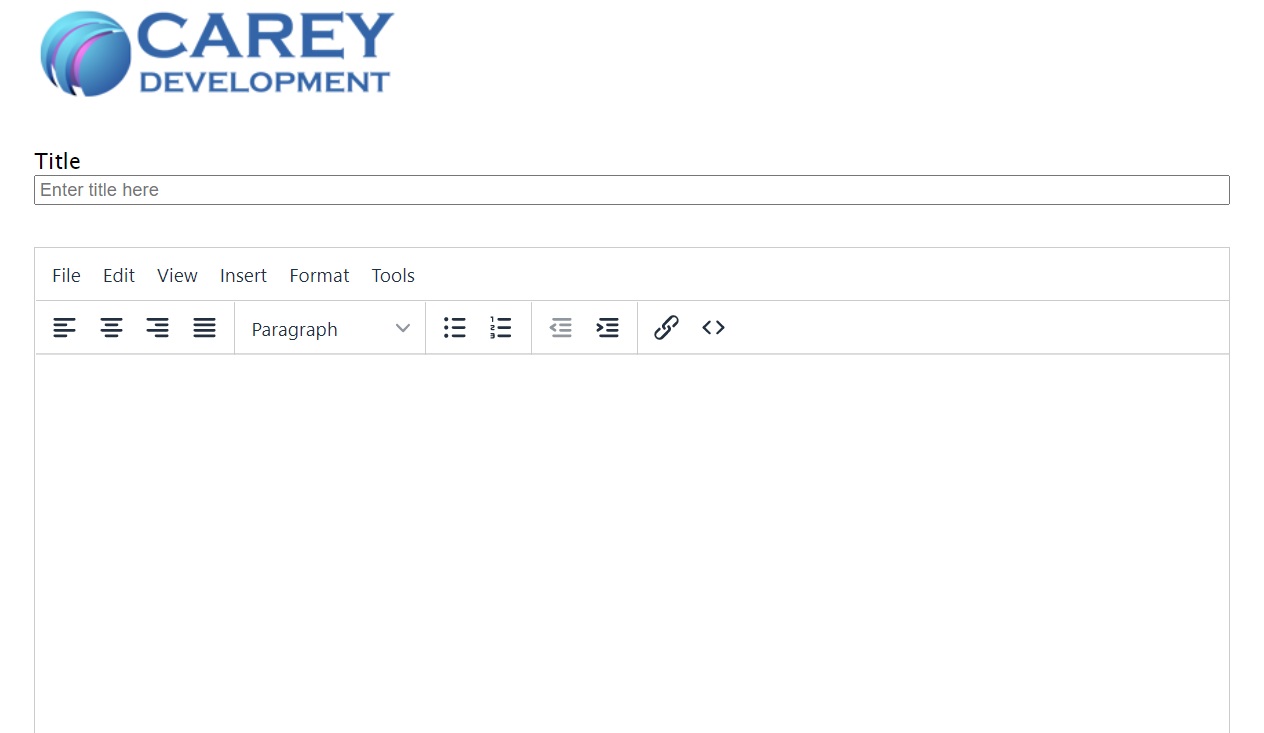
To make a long story short, that thing you're looking at above makes the toolbar in the WYSIWYG editor look like this:

If you read the code above from left to right and look at the icons in the image from left to right, you'll see that they line up perfectly.
The first icon gives users the ability to left-align their content. That's specified by the alignleft option in the code.
The second icon gives users the ability to center their content. That's specified by the aligncenter option in the code.
And so on.
Let's take a look at the next line:
toolbar_mode: 'floating',
So what does that do? It structures the layout of the toolbar based on the width of the editor and the defined toolbar groups.
You can see the toolbar groups in the previous configuration line. All of the groups are separated by a pipe ('|') character.
The floating config option tells TinyMCE to put toolbar groups in the toolbar drawer if they don't fit within the editor window.
And finally:
tinycomments_author: 'Brian Carey'
Well that's pretty easy to understand, isn't it? You'll want to change that to your own name.
Testing It Out
Okay. It's time to deploy the beast and give it a run.
You can do that by right-clicking on the TinyMceGuide class within Eclipse. Then, select Run As... from the context menu that appears and pick Java Application.
Get that bad boy up and running then hit the following URL:
http://localhost:8080/admin/addEditPost
You should a screen that looks like this:

If that's what you're looking at, then you're off to a great start.
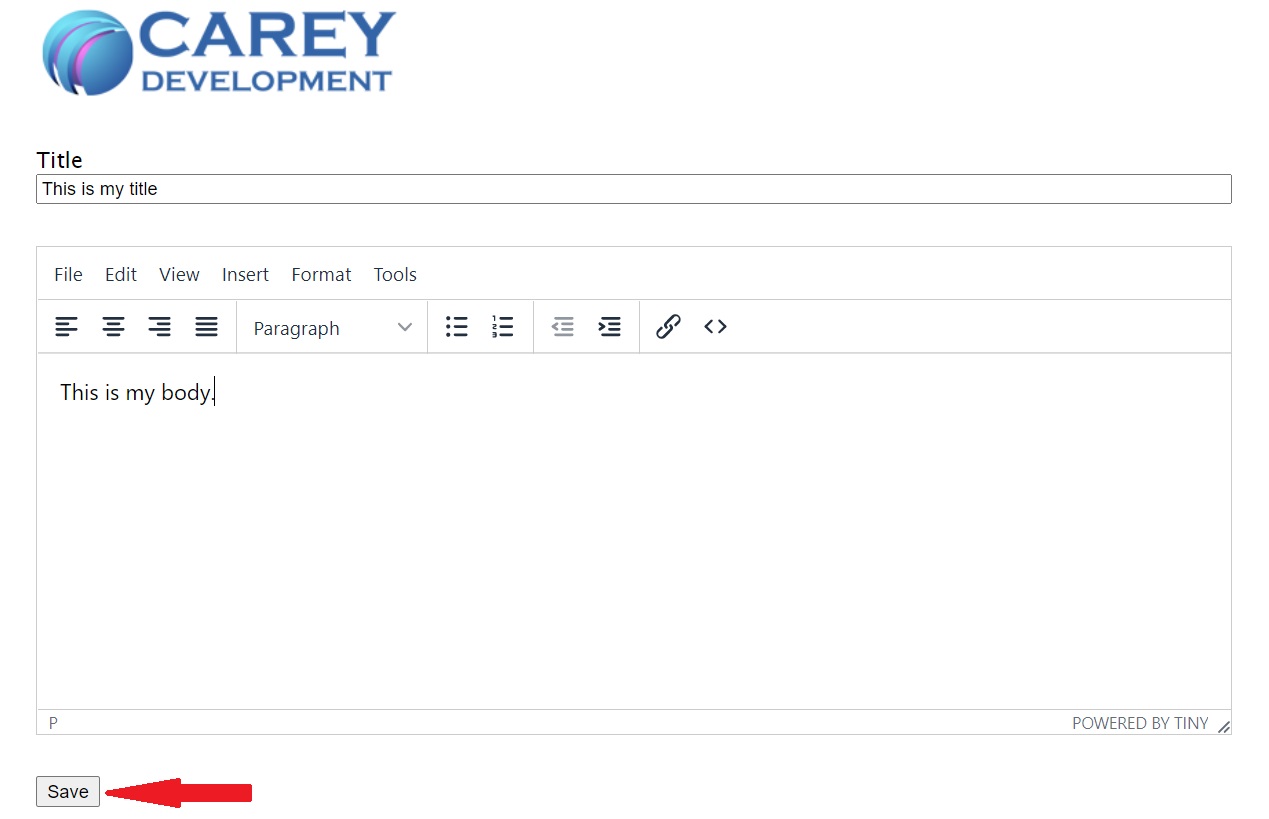
Now, type in a title like "This is my title."
Then, type in a body in the WYSIWYG editor. Go with something very original like "This is my body."
Then, click Save.

When you click the Save button. The screen will refresh. And it will seem like nothing happened.
But something did happen. To see what happened, you need to look at the log in Eclipse.
Remember, the method associated with POST just logs the title and body. It doesn't do anything else.

You can see that log usually in the lower, right-hand side of the Eclipse window. You might have to click the Console tab as above.
Take a look at the last two lines in the log. The first one is this:
Title is This is my title
And that's correct because that's exactly what you typed into the Title field.
Next, take a look at the line just below it:
Body is <p>This is my body.</p>
And that's also cor- wait a second. Where did that <p> and that </p> come from?
You didn't type those. How did they get there? Is this a bug?
Nope.
Remember, you entered your text in a WYSIWYG editor. That means you'll see what people will see when they visit the website. You won't see the HTML markup.
But TinyMCE puts that markup in there for you!
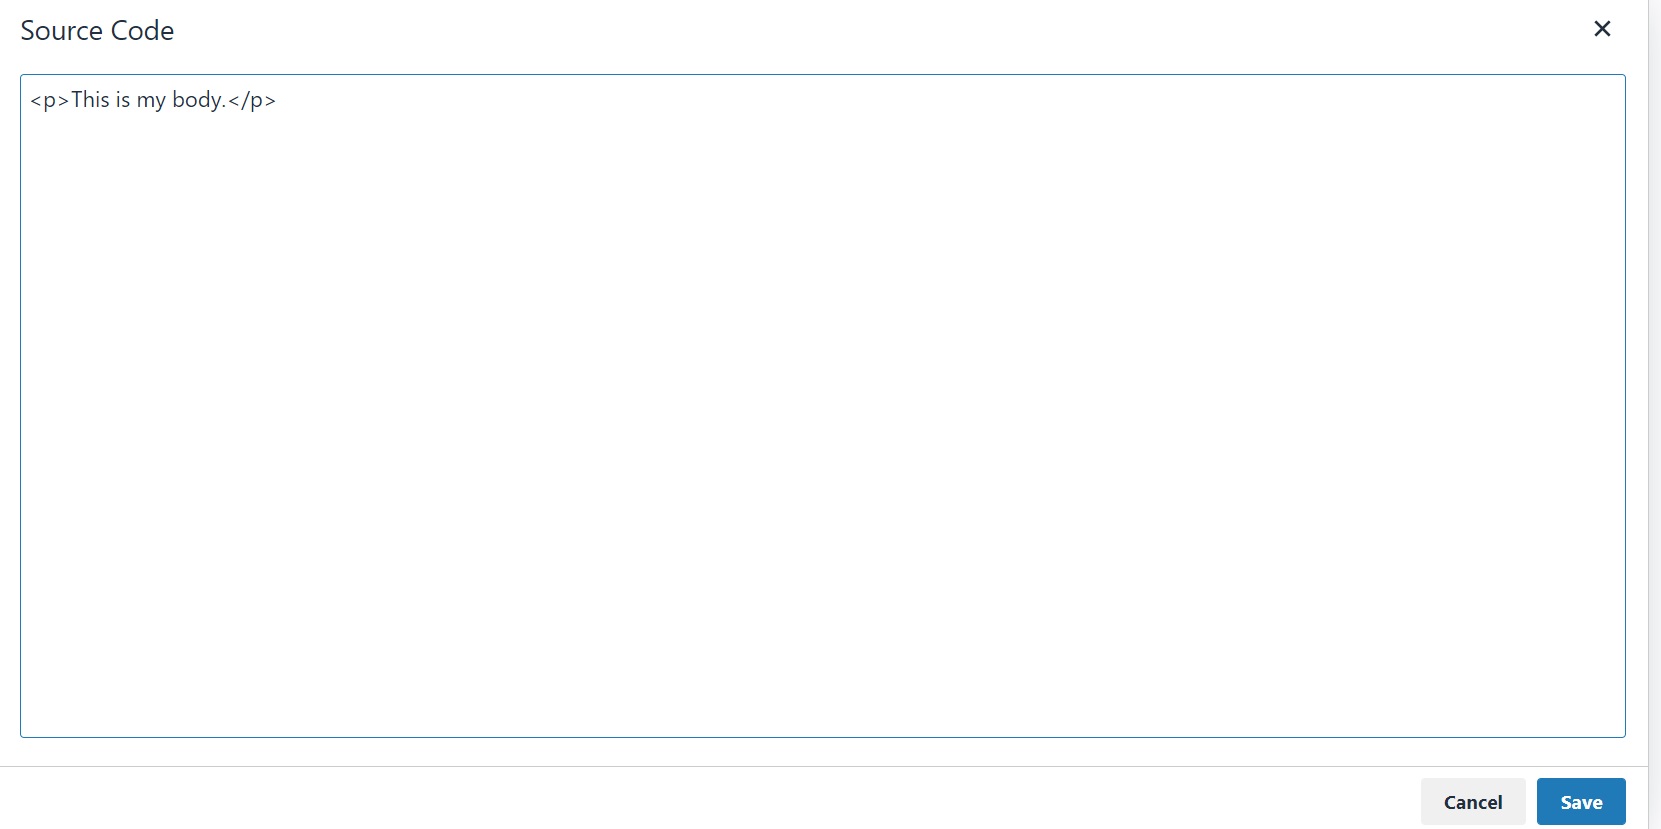
In this case, TinyMCE surrounded your one-sentence paragraph with <p> markup (for paragraph).
You can see the addition of the <p> markup if you click the code icon (the one on the far right) in the toolbar.

Bottom line: your TinyMCE editor is working as expected!
Wrapping It Up
Over to you. Now it's time to improve on what you've learned today.
Mess around with some of the icons in the toolbar. Add more plugins with different toolbar options.
Persist the info from the from to your favorite database.
And, remember, you can always browse the code on GitHub. Feel free to fork that code and update it to make it your own.
Have fun!


