Automated unit tests will save you from a world of heartache. Fortunately, you can easily implement Spring Boot web layer tests with MockMvc.
In this guide, I'll show you how to do just that.
You're welcome to follow along here or grab the source code from GitHub.
The Business Requirements
Your boss Smithers walks into your office with a toothpick in his mouth. He twirls it around a bit while giving you the latest marching orders.
"About that CRM app you're working on," he says. "You need to put some automated unit tests in there so we can have peace of mind that the code works as expected."
He twirls the toothpick around some more.
"I don't want our QA department doing all the heavy lifting here!" he says, rather loudly.
Then he walks out of your office while playing with his toothpick.
An All-Too-Easy Controller
Start by coding a very basic "Hello World" controller. But before you do that, create a model class so the controller has something to return.
public class Hello {

    private String message = "hello";

    public String getMessage() {
        return message;
    }

    public void setMessage(String message) {
        this.message = message;
    }

    public String toString() {
        return ReflectionToStringBuilder.toString(this);
    }
}
Easy. That class includes one and only one field: message.
That field defaults to the value "hello."
Now, with that in mind, create a controller that looks like this:
@RestController
public class HelloWorldController {

    @GetMapping("/helloworld")
    public ResponseEntity<?> helloWorld(HttpServletRequest request) {
        return ResponseEntity.ok(new Hello());
    }
}
Well that ain't nothin' to write home about. But it's a great way to get starting with testing at the web layer.
The method responds to a GET request (that's why it's annotated with @GetMapping) to the endpoint /helloworld.
Also, the method returns a ResponseEntity object that wraps around a newly instantiated Hello object.
The ok() part you see in the return line means that the response will generate a 200 status code, meaning "OK."
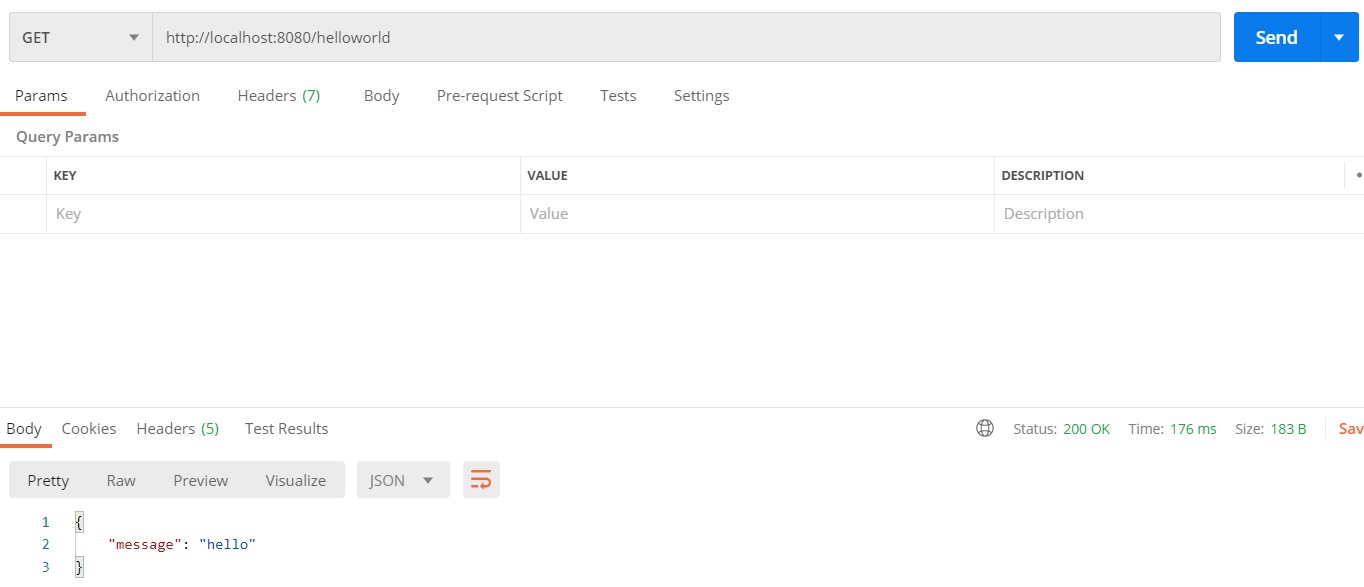
Launch your Spring Boot app with that controller and do a manual test with Postman. You should get a result that looks like this:
{
    "message": "hello"
}
Here's a screenshot from Postman.

Okay, great. So the manual test works. But how about the automated test?
Automating a Web Layer Test
To automate a web layer test like the one you just did manually, you'll use a class called MockMvc.
Now what exactly is that class and why is it called MockMvc?
The Mvc part is an acronym that stands for Model-View-Controller. It's an age-old design pattern that's popular to this very day.
In that pattern, the model represents the data that's created, retrieved, updated, or deleted within a single transaction. In the "Hello, World!" example above, the Hello object is the model.
The View is absent here. It's the UI that users see when they're interacting with the application. For the purposes of this guide, we're just focusing on what happens "behind the scenes."
The Controller, unsurprisingly, is the controller class that you saw above. It's the part of the application that responds to user inputs and actions.
Okay, so why is the word "Mock" in front of Mvc? That's because the testing framework in Spring allows you to insert mock objects into your tests.
Why would you want to do that? Because you don't want to perform integration tests at this point. You only want to perform unit tests.
Mocks help you run tests in isolation without hitting downstream services or databases. That's what makes them so attractive.
And Since You Want to Do That...
Now that you want to run unit test with MockMvc, you're going to need to update your POM file accordingly. Add this block:
<dependency>
    <groupId>org.springframework.boot</groupId>
    <artifactId>spring-boot-starter-test</artifactId>
</dependency>
That's going to give you the ability to run web layer tests within your Spring Boot project.
Now, create a new class to perform the tests. Go ahead and call it ValidatedWebAppTest since you'll be testing some validation logic a little later.
Remember: if you're using Maven, your test classes should go in src/test/java. Avoid putting them in src/main/java as that's where application logic belongs.
Go ahead and code the test class with your first test. It should look like this:
@SpringBootTest
@AutoConfigureMockMvc
public class ValidatedWebAppTest {

    @Autowired
    private MockMvc mockMvc;

    @Test
    public void testHelloWorldWithGoodResponse() throws Exception {
        this.mockMvc
        .perform(MockMvcRequestBuilders.get("/helloworld"))
        .andDo(MockMvcResultHandlers.print())
        .andExpect(MockMvcResultMatchers.status().isOk());
    }
}
Let's take everything up there one step at a time.
The @SpringBootTest annotation launches a Spring application context when you run the test. It's necessary here because that's how the application will "listen" for requests from your unit tests.
The @AutoConfigureMockMvc annotation is a convenient way to instantiate MockMvc. When you use that annotation, you won't have to instantiate it manually.
And that's why @Autowired works with the MockMvc declaration you see above the first method. It's an example of dependency injection in a unit test class.
Now, take a look at the method. It's annotated with @Test which is a dead giveaway that it runs a unit test. In fact, you need to use that annotation or Spring will ignore it.
The test itself invokes the perform() method on MockMvc. That method accepts a single parameter that's a type of RequestBuilder.
Fortunately, though, you can use the get() static method from MockMvcRequestBuilders to instantiate that RequestBuilder object fairly easily. All you need to do is provide the endpoint. In this case, the endpoint is /helloworld passed in as a string.
Remember: the endpoint expects a GET request. That's why the code uses the get() static method . The MockMvcRequestBuilders class also includes static methods named post(), put(), patch(), and delete() that handle the various other types of HTTP requests.
I'll go over an example using the post() method a little later.
Okay, so what's with that .andDo(MockMvcResultHandlers.print()) business?
It's helpful for debugging problems. It doesn't contribute anything to the test other than that.
That line will print out the request and response so if things don't go as expected, you can check the log to see what's happening.
And finally we get to the .andExpect() line. As the name implies, that's the line where you test what you received against what you expect.
In this case, all the code is doing is checking to make sure that the request got a response code of 200 (OK). I'll go over a more comprehensive test in a bit, but this is a good start.
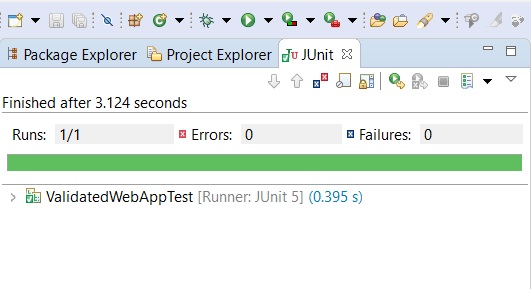
Now, run the test. If you're in Eclipse, you can do that by right-clicking on the test class name and then selecting Run As and JUnit Test from the context menu that appears.

After a few seconds, your test results should light up green.

Now, let's move on to some more sophisticated testing.
More Than Just a Status
You want to know more than the status code when you run your automated unit tests. That's why it's a good idea to parse the response body.
Fortunately, you can do that very easily with MockMvc and its associated helpers.
Update your test to look like this:
    @Test
    public void testHelloWorld() throws Exception {
        this.mockMvc
        .perform(MockMvcRequestBuilders.get("/helloworld"))
        .andDo(MockMvcResultHandlers.print())
        .andExpect(MockMvcResultMatchers.status().isOk())
        .andExpect(MockMvcResultMatchers.jsonPath("$.message").value("hello"));
    }
That last line is the new addition. It checks the results of the response body with the aid of JsonPath.
If you're unfamiliar with JsonPath, it's a way of navigating JSON documents. It's pretty slick.
You can think of it as XPath for JSON. That's assuming you're familiar with XPath. If not, then don't think of it that way.
Anyhoo, what JsonPath does is it lets you traverse to a specific point in the JSON document and check a value. That's exactly what's going on in that last line above.
The "$.message" string you see above is a JsonPath expression. It's saying: "Start at the root element and look for a property called 'message.'"
In JsonPath, the dollar sign ($) represents the root element. All expressions in JsonPath start with a dollar sign because... welll... everything has to start at the root.
The ".message" part of the string almost speaks for itself. The dot part indicates "child of." So here it's looking for a property that's a direct child of the root.
And that property is identified by the rest of the string: "message".
Remember, it's expecting this response:
{
    "message": "hello"
}
Next, the code above uses the .value() method to check the actual value of the "message" property. In this case, it's expecting the string "hello".
Now run that test again and once again you should see all green.
POST No Bills
Now you know how to do a GET with MockMvc, but what about a POST? That's pretty easy as well.
In the example app on GitHub, I've created some validation logic. If you're unfamiliar with validation logic, you can learn more about it in my guide on the subject.
The point here, though, is to test the validation with MockMvc.
First, take a look at what the controller is doing as it relates to validation:
    @PostMapping("")
    public ResponseEntity<?> createContact(@Validated(Contact.StepOne.class) @RequestBody Contact contact) {
        LOG.debug("Creating new contact: " + contact);
        return ResponseEntity.status(HttpStatus.CREATED).body(contact);
    }
That method simulates the creation of a new contact in a CRM application. It accepts a POST request to the /contact endpoint.
You can see that it's using group-level validation with the @Validated annotation.
It's also accepting a JSON request body that maps to the Contact class. A typical request payload would look like this:
{"firstName" : "Johnny", "lastName" : "Doe"}The validation logic ensures that the first and last name exist and that neither one of them is longer than 50 characters. Otherwise, the application will return a 400 status code ("Bad Request").
On the other hand, a successful request returns a status of 201 ("Created") and a response body that displays the newly created contact.
Now check your validation logic with a new method in the JUnit class you already created:
    @Test
    public void testCreateContactWithGoodData() throws Exception {
        this.mockMvc
            .perform(MockMvcRequestBuilders.post("/contact")
            .contentType(MediaType.APPLICATION_JSON)
            .content("{\"firstName\" : \"Johnny\", \"lastName\" : \"Doe\"}"))
            .andDo(MockMvcResultHandlers.print())
            .andExpect(MockMvcResultMatchers.status().is(HttpStatus.CREATED.value()))
            .andExpect(MockMvcResultMatchers.jsonPath("$.firstName").value("Johnny"));
    }
Some of that you're already familiar with. But let's go over a couple of important differences.
Note that the code uses MockMvcRequestBuilders.post() instead of .get(). That's because the controller method you saw above requires a POST HTTP method to create a new contact.
But remember: that method also accepts a request body with properties shared by the Contact class. So your test needs to send in a body as well.
That's where the content() method comes into play. As you can see above, it's hard-coding the exact same payload I showed you as an example just a few paragraphs up.
And the rest of the test should be familiar to you at this point.
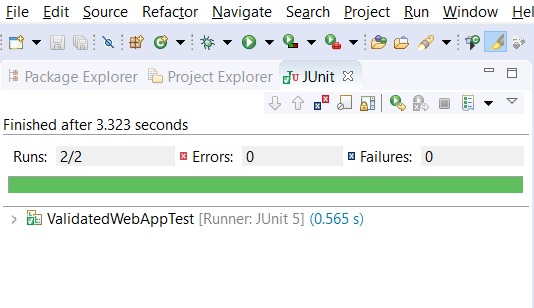
Now, run both of those tests and once again everything should light up green.

Bingo. You know how to run GET and POST tests with MockMvc.
Wrapping It Up
Now it's over to you to make some changes to the code you see above.
Update it to suit your own purposes. Try a put() or patch() test. Write another test to ensure that the application behaves as expected when validation fails.
As always, feel free to check out the code on GitHub.
Have fun!


