Got a TinyMCE WYSIWYG editor in your Spring Boot web app? Wanna enable users to upload images directly into their content? Fortunately, that's pretty easy.
You see, TinyMCE already empowers you to do that. You just have to put the code in the right place.
In this guide, I'll go over how to include a few lines of JavaScript into your existing TinyMCE editor so that people can upload images on the fly. Then, you'll have your own content management system (CMS) that's similar to WordPress.
Okay, not quite that sophisticated. But you're taking a step in that direction.
As you might have noticed, though, this guide assumes that you've already got TinyMCE up and running within your Spring Boot app. If you haven't done that, then check out the prerequisite.
Also: this guide uses Thymeleaf as the template engine of choice. If you'd like to use another engine, you'll have to update the code accordingly.
Speaking of the code, you can find it on GitHub.
The Use Case
Your boss Smithers walks into your office to tell you that he's mighty impressed with that work you did on incorporating a WYSIWYG editor into the company blog. However, he's concerned, even troubled, about something.
Users can't upload images directly into the content.
Instead, they have to upload an image to a server and hand-code an <img> tag in the HTML produced by the WYSIWYG editor.
Nope, not good enough, Smithers says.
So he assigns you with a new task: enable users to select an image from their hard drive and automagically upload it to the same server that's running the Spring Boot blog. Further, the solution also needs to put the necessary HTML code in the editor.
And it's due on Tuesday.
Storing Images?
You're a professional Spring Boot developer so you already know enough that images in Spring Boot web apps are usually packaged up within the JAR file.
When the application uses Thymeleaf and Maven, it's often the case the photos, icons, graphs, and other similar tidbits are stored in a /static folder under /application/resources. Then, Thymeleaf code references the files with a notation that looks like this:
<img class="top-logo" th:src="@{/img/branding/careydevelopment-logo-sm.png}"/>
That's all fine and dandy for images you store before packaging the application in a JAR file. But what about external images?
After all, you'll need users to upload images to a directory on the server. They certainly can't upload them to an already-packaged JAR file.
What's a software developer to do?
Fortunately, Spring Boot offers you some flexibility. You can reference images externally.
You'll have to do that with the aid of a configuration class, though. Here's what that class will look like:
@Configuration
public class WebConfig implements WebMvcConfigurer {

	public final static String IMAGE_RESOURCE_BASE = "/images/";
	public final static String IMAGE_FILE_BASE = "/web/careydevelopment/images/";
	public final static String BASE_URL = "http://localhost:8080";

    @Override
    public void addResourceHandlers(ResourceHandlerRegistry registry) {
        registry.addResourceHandler(IMAGE_RESOURCE_BASE + "**")
                .addResourceLocations("file:" + IMAGE_FILE_BASE);
    }
}
The @Configuration annotation at the top tells Spring Boot to pay attention to this class because it's a configuration class. If you leave that out, this solution won't work.
The class itself implements WebMvcConfigurer, an interface that includes one and only one method.
The addResourceHandlers() method enables you to map file locations on the server to URL paths.
To see what gets mapped to what, take a look at the constants before the method.
The IMAGE_RESOURCE_BASE constant defines the path segment that will serve images stored outside of the JAR file on the local server.
As you can see, that constant is set to /images/. So any URL path that begins with /images/ is going to deliver images store on the server outside of the JAR file rather than from the /static/ directory within the JAR file.
But where on the local server will it look?
For the answer to that question, check out the IMAGE_FILE_BASE constant. It points to /web/careydevelopment/images.
Also, take a quick peek at the BASE_URL constant. Here, it's http://localhost:8080. That's the server and port the application will run on.
You'll certainly want to reference that value from various environment-specific application.properties files later on when you go to production. For the purposes of this guide, though, it's a great idea to keep things simple.
Add up everything in the code above and here's what it means: when a user accesses a URL that starts with http://localhost:8080/images then Spring Boot will search for the image on the server's hard drive starting at /web/careydevelopment/images.
For example, this URL:
http://localhost:8080/images/2020/08/jollyman.jpgWill point to this image on the server:
/web/careydevelopment/images/2020/08/jollyman.jpg
And yes, that /web part is directly off the root of the server.
By the way, you can do this with Linux or Windows. Should work beautifully either way.
Uploading Images
Now that you've got that out of the way, it's time to handle the process of uploading images.
Here's how it works: when somebody embeds an image in the WYSIWYG editor, that person will see the image within the content. Behind, the scenes, though, TinyMCE will upload the image to your server. Then, the app will store it in the path as specified in the previous section.
Of course, to enable that, you'll need a controller that accepts file uploads. And here's what it looks like:
@RestController
@RequestMapping("/upload")
public class FileUploaderController {


	@PostMapping("/image")
	public String saveImage(@RequestParam("file") MultipartFile file) {
	    String url = null;

		try {
			url = copyFile(file);
		} catch (Exception e) {
			e.printStackTrace();
		}

		return url;
	}


	private String copyFile(MultipartFile file) throws Exception {
		String url = null;
		String fileName = file.getOriginalFilename();

		try (InputStream is = file.getInputStream()) {
			Path path = FileUtil.getImagePath(fileName);

			Files.copy(is, path);

			url = FileUtil.getImageUrl(fileName);
		} catch (IOException ie) {
			ie.printStackTrace();
			throw new Exception("Failed to upload!");
		}

		return url;
	}
}
This class gets the @RestController annotation treatment because it's not serving a Thymeleaf template. Instead, it's accept file uploads via a POST.
The @RequestMapping annotation at the top identifies the URL path segment for all public methods in this controller. That's set to /upload.
However, there's only one public method in this controller: saveImage(). The @PostMapping annotation maps that method to the /image URL path segment.
That means when a user POSTs a request to http://localhost:8080/upload/image, then the saveImage() method in the FileUploadController class will execute.
And what does that method do? Well, for starters it's expecting a request parameter called "file." That's the @RequestParam annotation you see in the method signature.
But check out the variable declaration after the annotation. It's not a String or an Integer. It's a MultipartFile!
That might be a new one to you, but it makes perfect sense here. This method isn't accepting a simple JSON payload with fields and values. It's sucking in the contents of an image file.
In this case, it's Base 64 encoded content.
Why the encoding? It's a convenient way to transmit binary data vita HTTP.
The method itself is pretty straightforward. It just takes the contents of the MultipartFile and spits them out as a file on the server. It's a pretty nifty method that you might yourself using over and over again in your Spring Boot apps.
You're welcome.
But let's stop for a moment and take a look at this line:
String fileName = file.getOriginalFilename();
You might think that file name will match the name of the file the user uploads. But it doesn't.
That's because TinyMCE renames the file. As you'll see later, the uploaded file name will look like this: blobid1598626219760.jpg.
For the purposes of this tutorial, I'm leaving that alone. Again, we're just trying to get something up and running.
However, you also probably want to follow the Facebook pattern and rename uploaded files. If you go that route, you can prevent file name collisions.
Another thing: you'll see a reference to a FileUtil class in the code. It's a class that offers several static utility methods for handling files. I won't go over it line-by-line here. But it's pretty easy to follow.
Okay, so what about this String that saveImage() returns? What's that all about?
That's the URL of the image after it's copied to the file directory on the server. The WYSIWYG editor will need that to produce the proper <img> tag.
One more thing to keep in mind: you want to add security to this URL path before you go to production!
Why? Because if you don't then anybody can upload an image to your server. You don't want that.
If you'd like to gain some insight on how to implement security on a Spring Boot app with a JSON Web Token, check out my guide on the subject.
The Template
Now that you've got the back-end stuff out of the way, let's take a look at what needs to happen on the front end. Specifically, let's go over the addEditPost.html Thymeleaf template.
To keep things brief, I'll just go over the relevant changes from my previous guide. If you need to know how the whole thing works, then feel free to review the code comments in that article.
Here are a couple of changes from the TinyMCE configuration:
plugins: 'link lists media image code',
toolbar: 'alignleft aligncenter alignright alignjustify | formatselect | bullist numlist | outdent indent | link image code',
Note the addition of image in both lines. Those additions enable users to upload an image by clicking an image icon on the toolbar.
But how does the upload actually happen? That's with the assistance of the image upload handler. It's also defined in the TinyMCE configuration:
images_upload_handler: function (blobInfo, success, failure) {
    var xhr, formData;

    xhr = new XMLHttpRequest();
    xhr.withCredentials = false;
    xhr.open('POST', 'http://localhost:8080/upload/image');

    xhr.onload = function () {
        var json;

        if (xhr.status != 200) {
            failure('HTTP Error: ' + xhr.status);
            return;
        }

        json = xhr.responseText;
        success(json);
    };


    formData = new FormData();
    formData.append('file', blobInfo.blob(), blobInfo.filename());

    xhr.send(formData);
}
What's going on there? That's an AJAX function.
Now you might be wondering why it's a good idea to go "old school" with AJAX here. Why not use jQuery?
Well there are two answers to that question:
- This method works
- This method is endorsed by TinyMCE
But if you'd like to refactor it, you're welcome to do so.
Anyhoo, it's fairly straightforward. Note that it's POSTing to the URL path handled by the controller method you saw in the previous section.
Specifically, the function POSTs a form (that's the formData object) that includes the binary of the image file as well as the file name.
Remember: the binary here is Base 64 encoded.
Following the POST, the code checks for a response status. If that response status is anything other than 200 (OK), then the code calls the failure() function. Otherwise, it calls success().
You won't see those two functions defined here. They're defined in the TinyMCE library.
However, the success() function will take the URL returned by the POST request and use that URL to create the <img> tag in the WYSIWYG editor.
Let's take a look at some more configuration options:
/* enable title field in the Image dialog*/
image_title: true,

/* enable automatic uploads of images represented by blob or data URIs*/
automatic_uploads: true,

/*Here we add custom filepicker only to Image dialog*/
file_picker_types: 'image',
Those comments brought to you courtesy of the good folks at TinyMCE. I didn't write them.
The first option will display the image title. In this case, the image "title" is nothing more than the file name.
The second option will automatically upload files that users include in their content.
The third option specifies the kind of file picker that users will see when they want to upload an image.
Here's the dialog that appears when users click the image icon on the toolbar:
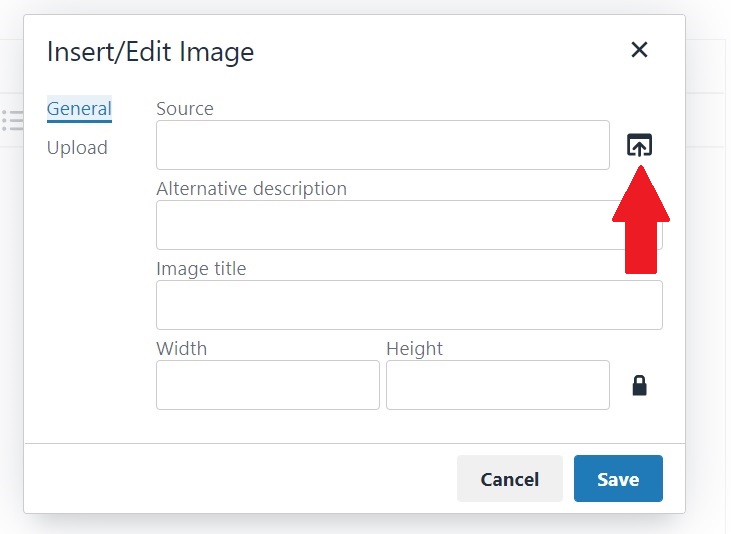
Then users click the file picker icon (identified by the red arrow) to maneuver around the hard drive and select an image to upload. When they pick an image, they'll see something like this:
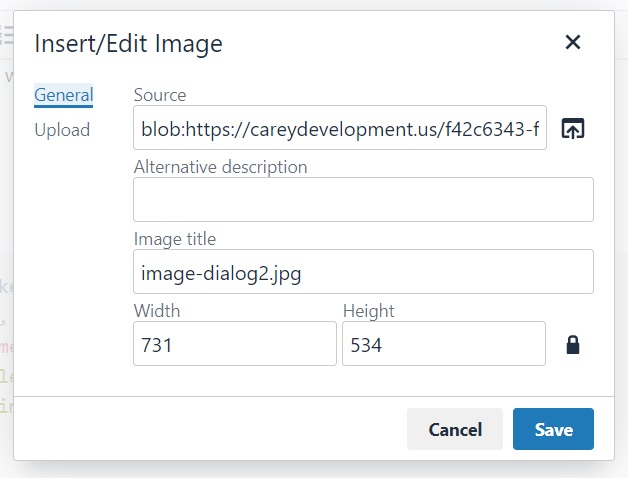
To see how that dialog gets populated, let's take a look at the file picker callback:
/* and here's our custom image picker*/
file_picker_callback: function (cb, value, meta) {
    var input = document.createElement('input');
    input.setAttribute('type', 'file');
    input.setAttribute('accept', 'image/*');

    input.onchange = function () {
        var file = this.files[0];
        var reader = new FileReader();

        reader.onload = function () {
            /*
            Note: Now we need to register the blob in TinyMCEs image blob
            registry. In the next release this part hopefully won't be
            necessary, as we are looking to handle it internally.
            */
            var id = 'blobid' + (new Date()).getTime();
            var blobCache =  tinymce.activeEditor.editorUpload.blobCache;
            var base64 = reader.result.split(',')[1];

            var blobInfo = blobCache.create(id, file, base64);
            blobCache.add(blobInfo);

            /* call the callback and populate the Title field with the file name */
            cb(blobInfo.blobUri(), { title: file.name });
        };

        reader.readAsDataURL(file);
    };

    input.click();
}
A lot going on there. Let's break it down.
Towards the top, you see the code creating a new input element. That element is the file picker. It brings up the file browsing dialog that users see when they click the file picker icon.
But what happens when users select a file? That's defined in input.onchange().
As you can see, that callback defines two objects right at the top: file and reader.
The file object is the image file that the user specified via the image picker. The reader object reads the contents of the file as a binary large object (or "blob") so that client-side code can send it to the server.
Next, let's take a look at the reader.onload() callback function.
Once again: the comments aren't my own. So feel free to read TinyMCE's "hopefully we won't have to do this in the future" message and take it to heart.
Or don't.
Take a look at this line:
var id = 'blobid' + (new Date()).getTime();
In the previous section I mentioned that the file name gets changed. This is where it gets changed.
That id becomes the file name. As you can see, it's just the word "blobid" concatenated with the current date and time in numerical format.
The next few lines create TinyMCE's blobCache object and populate that object with the Base 64 contents of the image file.
The cb() line populates the image picker's fields. That gives users a chance to double-check everything before they click on Save.
Finally, way at the bottom of that callback definition, you'll find this line:
input.click();
What the heck does that do? That clicks the element so that it brings up the file browsing dialog. If you leave that out, clicking the file picker icon will do nothing.
Why do you have to programmatically click an element? Because the user isn't clicking it.
The user clicks on an icon that's not an input element. So the code creates an input element on the fly and clicks on it for the user.
Testing It Out
Now that you've gone over the code, it's time to deploy the app and test it out.
As per usual, if you're running from within Eclipse you can just right-click on the TinyMceImageGuide class and select Run As... from the context menu that appears. Then, select Java Application.
Next, hit the following URL: http://localhost:8080/admin/addEditPost
That should bring up a screen that look like the one you see below. Click on that image icon.
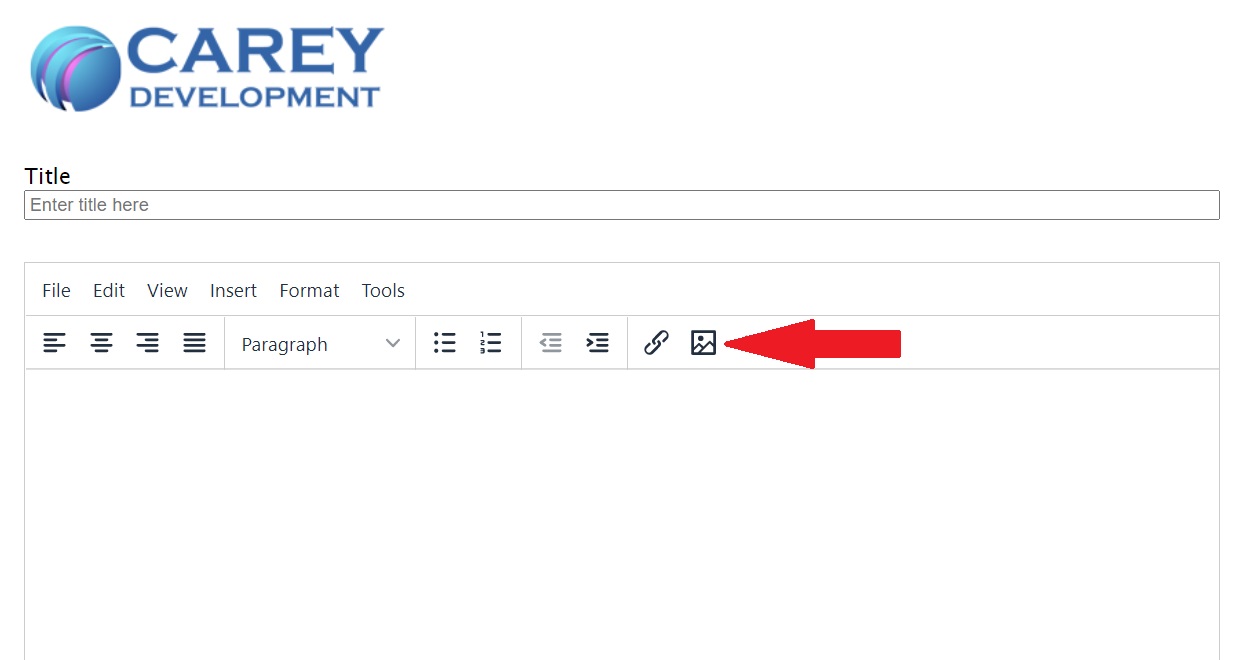
When you do that, you'll see an image picker dialog like the one you saw above. Use that dialog to browse around your file system and find a suitable image to upload.
Once you've selected an image, you'll see that the fields on the dialog get populated with info about the image. Again, you've seen that before in the previous section. But in case you need a reminder:
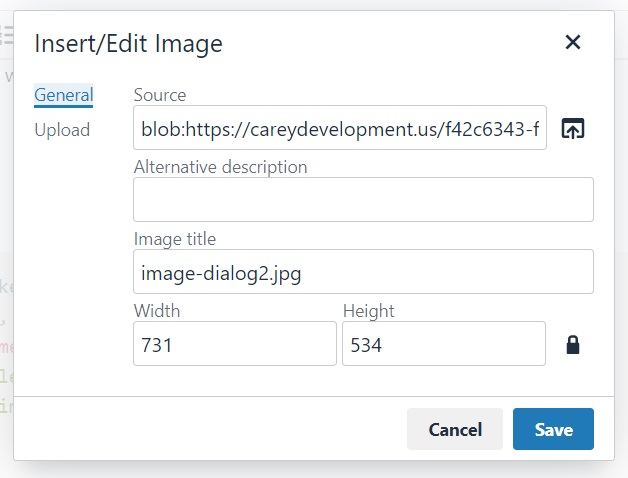
Now click Save on that dialog. If everything went according to plan, your file will get uploaded to your PC in the /web/careydevelopment/images base directory.
A caveat here: If you're using the FileUtil class that I've included in the source then you'll find your image in subdirectories identified by the current year and month.
In that case, you'll see your image file in /web/careydevelopment/images/2020/08 or whatever year and month it is right now.
So go check that directory for the image file. You should see something like:
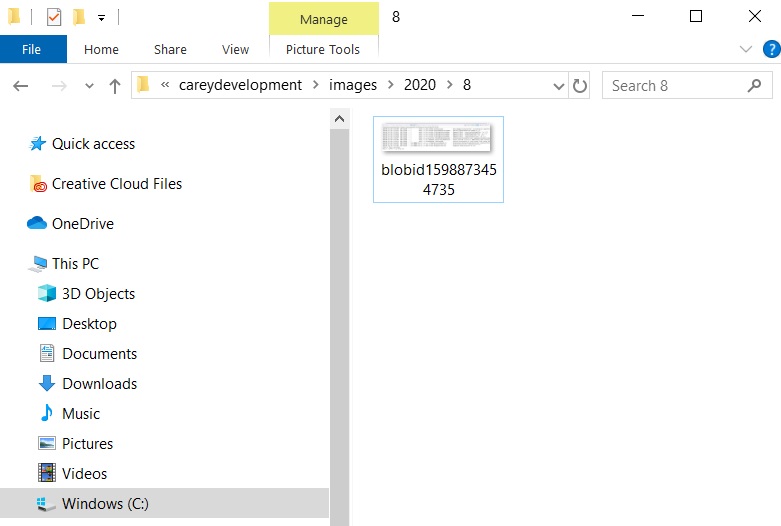
There you have it. That's a success.
But wait! There's more!
You should also see the image in your WYSIWYG editor. Like this:
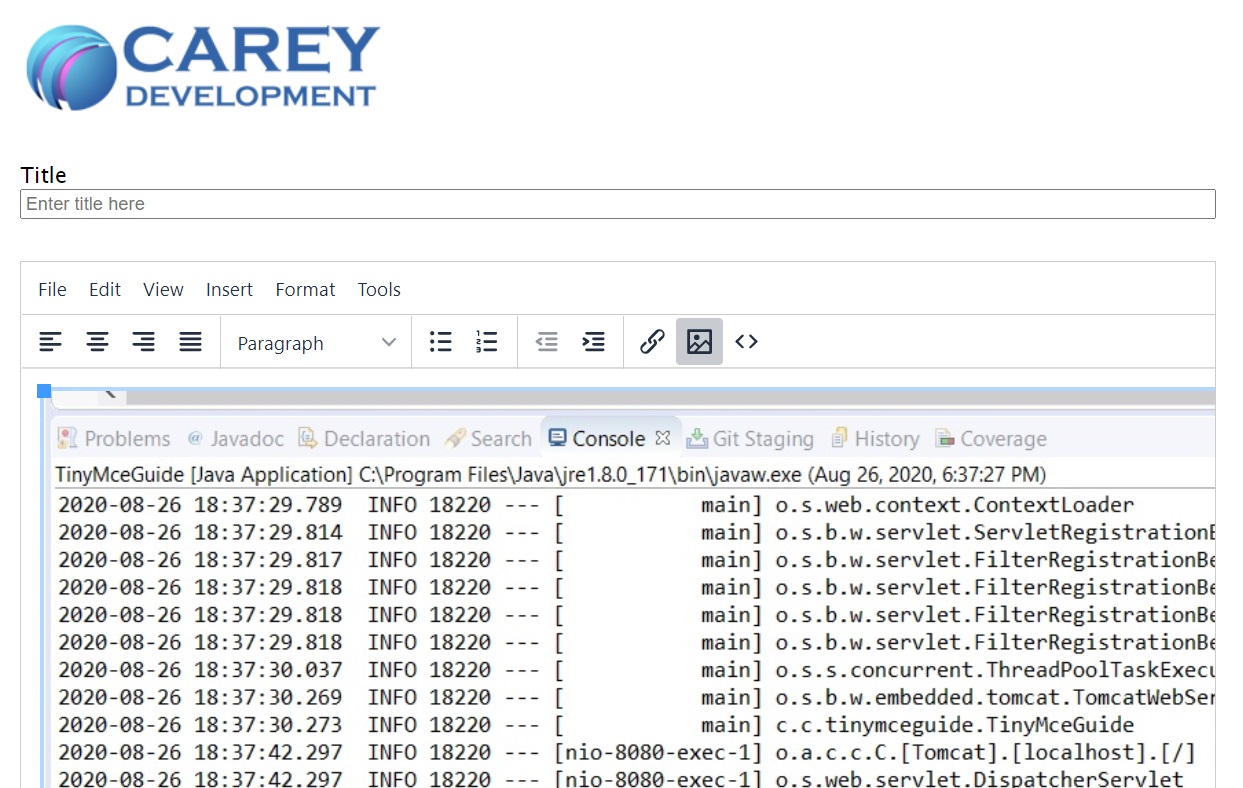
There it is. A picture of an Eclipse log.
Next, look at the code behind the WYSIWYG editor. Just click the <> icon on the far right of the toolbar.
You should see something like this:

There's the <img> tag with a src attribute that points to a relative URL. And if you remember the configuration option you specified way back in the second section of this article, you'll see that the URL maps to the location of the file on the hard drive.
Wrapping It Up
Now you know how to use TinyMCE with Thymeleaf and Spring Boot to upload images.
Why not take your knowledge to the next level? Add security so only admins can create posts and upload images. Include your own algorithm for renaming files.
And remember: you can always use the code on GitHub as a starting point.
Have fun!


